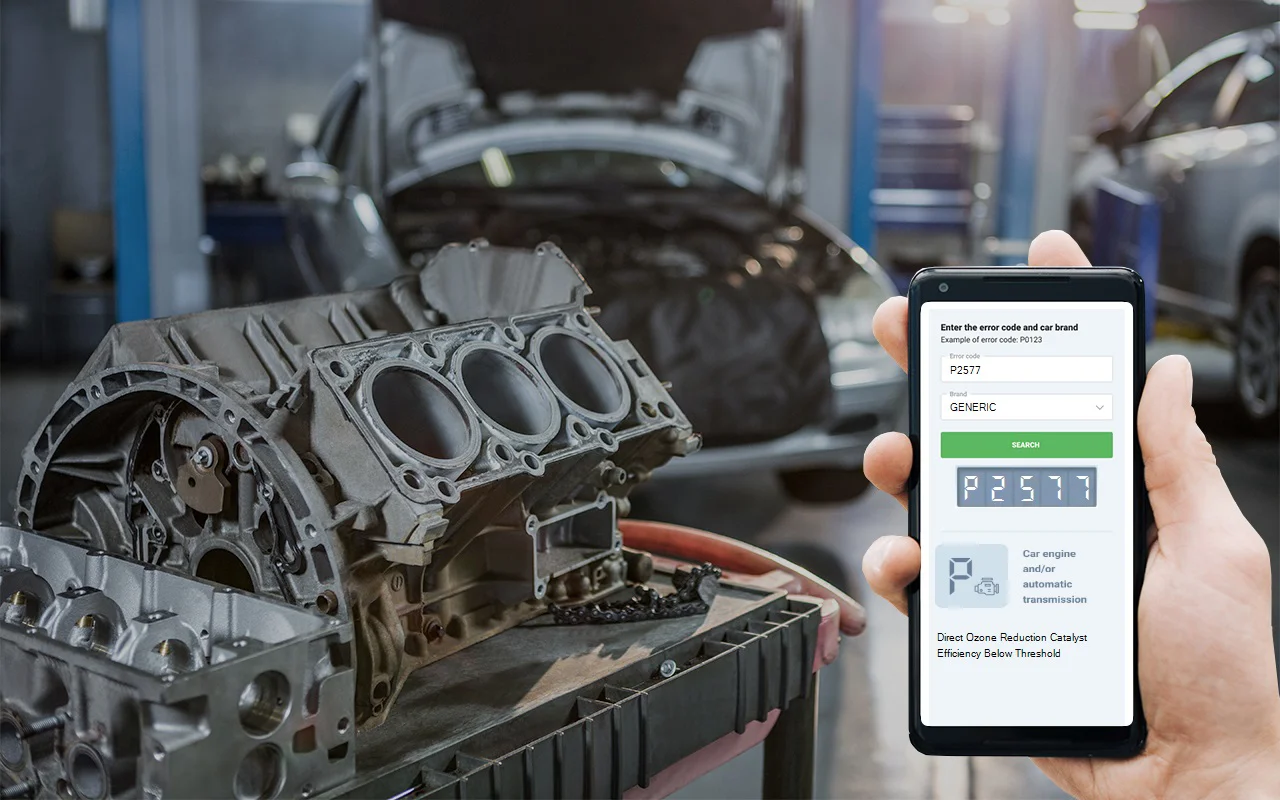
Causes of P2577 engine code
From what I’ve seen in the shop and based on official repair info, the most common reasons for a P2577 code are pretty consistent across Chevrolet, Ford, and GMC. Here’s what usually triggers it:
- A faulty ozone reduction catalyst sensor (sometimes called a direct ozone catalyst deterioration sensor)
- Broken, shorted, or open wiring in the sensor harness
- Poor electrical connections at the sensor or in the related circuit-think corroded, bent, or loose pins in the connectors
Most often, the issue is with the sensor itself or the wiring leading to it. I’ve also seen cases where a connector gets water intrusion or corrosion, which throws the whole system off.
Symptoms of dtc P2577
When this code pops up, the main thing you’ll notice is the check engine light coming on. In most cases, you won’t feel any difference in how the car runs-no rough idle, no loss of power, nothing obvious. But don’t let that fool you. Even if the car seems fine, the emissions system isn’t working as it should, and that can lead to bigger problems down the line.

Diagnosis steps for P2577 trouble code
Here’s how I usually tackle a P2577 code, step by step:
- First, I start with a visual inspection. Pop the hood and look at the wiring and connectors going to the ozone reduction catalyst sensor. Check for any obvious damage-broken wires, loose plugs, or signs of corrosion. It’s best to have good lighting and maybe a small mirror for those hard-to-see spots.
- Next, I’ll gently tug on the wiring harness to see if anything is loose or if the insulation is cracked. If you spot any greenish corrosion or bent pins in the connectors, that’s a red flag.
- If everything looks good visually, I move on to testing the sensor itself. Using a multimeter, I’ll check for proper voltage and continuity in the sensor circuit according to the factory specs. If you’re not comfortable with this, it’s better to have someone with experience help out.
- If the sensor and wiring check out, I’ll clear the code and see if it comes back. Sometimes, a one-time glitch can set it off, but if it returns, there’s definitely a deeper issue.
Don’t forget to inspect the connectors closely before moving on to more expensive parts-sometimes it’s just a simple connection problem.
Common mistakes when fixing obd code P2577
I’ve seen a few common slip-ups when folks try to fix this code. One is jumping straight to replacing the sensor without checking the wiring and connectors first. Another is ignoring corrosion or loose pins in the connector, which can cause intermittent problems. And sometimes, people clear the code and hope it won’t come back, but that’s just asking for trouble. Always make sure you’ve found the real cause before replacing any parts.

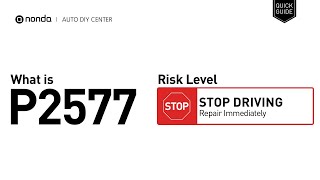
How serious is obd2 code P2577
Honestly, this isn’t a code you want to ignore. While it might not cause immediate drivability issues, it means your emissions system isn’t working right. Over time, this can lead to increased pollution, possible damage to the catalyst itself, and even failed emissions tests. If the wiring is shorted, it could potentially cause electrical issues elsewhere. Things can go south quickly if overlooked, and replacing a damaged catalyst is a lot more expensive than fixing a sensor or connector early on.
Repair procedures for P2577 code
Here’s what usually fixes a P2577 code, based on verified repair cases and OEM procedures:
- Repair or replace any damaged wiring or connectors in the sensor circuit
- Clean any corrosion from the connectors and make sure all pins are straight and making good contact
- If the wiring and connectors are fine, replace the ozone reduction catalyst sensor with a new, OEM-approved part
- Clear the code and test drive the vehicle to make sure it doesn’t return
It’s best to start with the simple stuff-wiring and connectors-before spending money on a new sensor.


Conclusion
To sum it up, P2577 means your car’s ozone reduction catalyst system isn’t working as it should, usually because of a sensor or wiring issue. It’s not something to put off, since it can lead to bigger problems and even damage your emissions system. The best approach is to start with a careful inspection of the wiring and connectors, then move on to the sensor if needed. Acting quickly and methodically is the most reliable way to get your car back to running clean and trouble-free.